
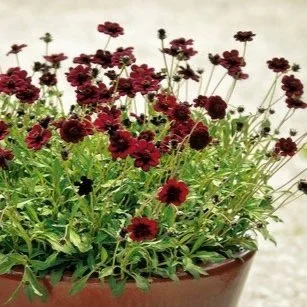
Boost Your Vegetable Garden!
If you want a thriving, productive vegetable garden, it all starts beneath your feet—with healthy, living soil. The key to increasing yield and growing vibrant, nutrient-rich veggies is to focus on building soil biology. When your soil is rich in organic matter and teeming with microbial life, your plants will have everything they need to flourish.
Why Amend Your Soil?
Vegetables are heavy feeders, and over time, even good soil can become depleted. Amending your garden beds helps replenish nutrients, improve structure, and support the living organisms that help your plants thrive. Think of it as feeding your soil, not just your plants.
Start with Compost + Biology
A good layer of compost is one of the best ways to give your soil a boost. It improves texture, enhances nutrient retention, and adds beneficial microbes. Pair your compost with targeted amendments to supercharge the biology in your garden. Our favorite products for veggie beds include:
Purple Cow Classic Compost – Rich, leaf-based, and packed with organic matter to fuel your soil.
Cowsmo Compost – A high-quality, manure-based, nutrient-dense compost that supports strong root development.
Worm Castings – A natural source of slow-release nutrients and beneficial microbes.
Mycorrhizae – These powerful fungi form symbiotic relationships with plant roots, helping them absorb water and nutrients more efficiently.
By adding a mix of these amendments, you're introducing a diverse array of microorganisms to your soil—a crucial step for long-term garden health and higher yields.
Don’t Forget Soil Texture
Biology is important, but drainage and structure matter too. If you’re dealing with heavy clay soil, lighten it up with materials like sand or perlite to improve aeration and prevent root rot. For sandy or overly light soils, boost water and nutrient retention with organic matter like compost or peat moss.
Keep Soil Alive Year-Round
Consider planting cover crops in the off-season to keep roots in the ground and feed the soil even when you’re not growing veggies. Cover crops improve structure, increase organic matter, and support active microbial life through the winter months.
Where to Start
Ready to build better soil? Stop by our garden center and chat with our team! We carry all the products mentioned above and can help you choose the right mix for your garden’s needs. Whether you’re starting fresh or looking to boost an existing bed, we’re here to help you grow your best vegetables yet.

Rethinking Your Lawn

Tired of fighting with your traditional lawn every summer? Between watering, mowing, fertilizing, and weeding, maintaining a perfect green lawn can feel like a full-time job. That’s why we recommend turning to low-maintenance, eco-friendly lawn alternatives—and two of our favorites are clover lawns and Flawn!
Why Choose Clover?
Clover lawns are gaining popularity for good reason:
Low Maintenance: Clover requires less mowing than traditional grass and stays lush and green even during dry spells.
Natural Fertilizer: Clover fixes nitrogen in the soil, which means it helps feed itself (and nearby plants!) without synthetic fertilizers.
Pollinator-Friendly: Bees and butterflies love clover flowers, making your yard a haven for important pollinators.
Soft Underfoot: Clover is soft and cushiony, making it perfect for barefoot strolls or lounging in the yard.
We carry clover seed in our garden shop, so stop in to learn more!
What is Flawn?
Flawn Seed Kits is a local company, specializing in a creative, colorful alternative to the traditional green expanse. Flawn (flower + lawn) is a mix of low-growing flowering plants and ground covers designed to bloom throughout the growing season—offering a beautiful, bee-friendly yard that requires way less work.
Benefits of a Flawn:
Less Mowing & Watering
Seasonal Color and Texture
Supports Local Pollinators
Totally Unique & Eye-Catching
We have a variety of Flawn seed blends in stock, each curated for different looks, sun exposures, and soil types.
Available Now in Our Garden Shop
Ready to rethink your lawn? We have a full selection of clover seed, Flawn mixes, and other eco-friendly lawn alternatives available now in our garden shop. Whether you're looking to overseed, start fresh, or just reduce your turf footprint, our team can help you pick the perfect solution for your yard.
Come see us and let's green up your space!

Exclusive First Look | New 2025 Trees & Shrubs ✨
Take a peek at what is coming to Down to Earth! Fresh for 2025, these varieties will hit our tree and shrub yard this spring/summer, just in time for you to introduce them to your own landscaping!
Fruit trees, foliage forward shrubs, beautiful blooming hydrangeas, and so much more - we know that these will be some of our new favorites!


Exclusive First Look | New 2025 Perennials ✨
A fresh wave of breathtaking perennials is making its way to Down to Earth this spring—and you’re getting an exclusive first look!
As the season awakens, we’re bringing in a fresh lineup of long-lasting beauties that will return year after year. 🌿🌸 From eye-catching blooms to hardy, garden-worthy favorites, these perennials are ready to elevate your landscape with color, texture, and effortless charm.
Be the first to discover this season’s must-have varieties—coming soon to our garden center!


Exclusive First Look | New 2025 Annuals ✨
Consider this your VIP sneak peek into the newest showstoppers arriving this spring to Down to Earth —before they hit the greenhouses!
Spring is just around the corner, and we’re rolling out the red carpet for the freshest annuals of the season! 🌿💐 Get ready to meet the boldest blooms, the trendiest colors, and the must-have varieties that will take your garden to the next level.
Find all these varieties and other favorites this spring!


Terrarium 101: How to Build Your Own Miniature Garden

Terrariums are a fun and easy way to bring greenery into your home—no backyard required! These self-contained ecosystems are low-maintenance, customizable, and perfect for any space. Whether you're a seasoned plant lover or a beginner, building a terrarium is a rewarding and creative project.
At Down to Earth, we have everything you need to craft the perfect, customized terrarium. Follow this step-by-step guide, and be sure to stop by for supplies or join one of our hands-on classes!
Step 1: Choose Your Container
Terrariums can be open or closed, depending on the plants you want to use.
Closed terrariums create a humid environment, ideal for ferns, mosses, and tropical plants.
Open terrariums work best for succulents, cacti, and air plants, which prefer drier conditions.
Step 2: Create Drainage Layers
Since terrariums don’t have drainage holes, layering is key to prevent root rot. Here’s the suggested order:
1. Pebbles or gravel – Start with a 1-2 inch layer at the bottom for drainage.
2. Activated charcoal – A thin layer of charcoal helps filter the air and prevent odors.
3. Potting mix – Choose the right soil for your plants: cactus mix for succulents or moisture-retaining soil for tropical plants.
Step 3: Pick Your Plants
The best part—choosing your plants! Consider size, growth habits, and light needs. Here are a few ideas:
- For closed terrariums: Ferns, moss, baby’s tears, fittonia (nerve plant).
- For open terrariums: Succulents, air plants, jade, echeveria, and cacti.
Step 4: Plant & Decorate
Now for the fun part!
1. Make small holes in the soil and carefully plant your selections.
2. Arrange plants with taller ones in the back and smaller ones in the front.
3. Add decorative elements like moss, small stones, driftwood, or figurines for personality.
Step 5: Care & Maintenance
- Watering: Closed terrariums need occasional misting; open ones require light watering when soil is dry.
- Light: Place in bright, indirect light. Avoid direct sun for closed terrariums to prevent overheating.
- Pruning: Trim plants as needed to keep growth in check.
Want to learn more? Let our expert team guide you through the process as you build your own stunning terrarium to take home!
📍 Visit us at Down to Earth to shop supplies or sign up for a class today!

DIY Landscape Design

Designing your outdoor space is an exciting opportunity to create a beautiful and functional environment that enhances your home. Whether you want a serene retreat, a lively entertainment space, or a low-maintenance garden, having a well-thought-out plan is key. Here’s how to approach landscape design effectively:
1. Define Your Goal
Before breaking ground, consider what you want from your landscape:
Aesthetic Appeal – Do you want a lush garden, modern minimalism, or a natural woodland feel?
Functionality – Will this space be used for entertaining, relaxation, or growing vegetables?
Entertainment & Socializing – Do you need areas for gatherings, like a patio, fire pit, or outdoor kitchen?
Defining your primary purpose will shape every decision you make.
2. Assess Your Environment
Understanding the natural conditions of your space will help in selecting the right plants and materials:
Sunlight Exposure – Determine how much sunlight different areas receive. Some plants thrive in full sun, while others require shade.
Soil Quality – Test your soil to understand its composition and pH. Amend as needed to support healthy plant growth.
Water Drainage – Identify any problem areas where water pools. Proper grading or drainage solutions will prevent water damage and erosion.
Slope - Do you need to add any walls to help flatten your space? Consider a retaining or boulder wall into your design plan.
3. Gather Inspiration & Define Your Style
Browse landscaping ideas online, visit local gardens, and take note of designs that resonate with you. Having a visual reference will help guide your choices for:
Hardscape elements (patios, walkways, retaining walls)
Plant types and arrangements
Decorative features (fountains, sculptures, or trellises)
4. Consider Maintenance Levels
How much time and effort are you willing to invest in upkeep?
Low-Maintenance Landscaping – Opt for drought-resistant plants, mulched beds, and automated irrigation.
High-Maintenance Gardens – If you love gardening, incorporate flower beds, vegetable gardens, or intricate landscaping features.
5. Develop a Plan & Layout
Once you have your ideas and preferences in mind, it’s time to map out the space. You can sketch it yourself or hire our professional landscape design team. Follow these steps:
Start at the House and Work Outward – Your home’s architecture should guide the flow of the landscape.
Establish Prominent Features First – Place patios, pools, ponds, or large trees before smaller elements.
Define Bed Lines & Pathways – These structures help create visual balance and guide movement through the space.
Choose the Right Plants – Select varieties that suit your climate, soil, and desired look. Mix heights, textures, and colors for visual interest.
6. Implement & Enjoy Your New Landscape
Once your design is finalized, it’s time to bring it to life. Whether you’re DIY-ing or working with our professionals, take the process step by step. After installation, enjoy your outdoor space and make adjustments as needed over time.
With careful planning, your landscape can become a beautiful, functional, and sustainable extension of your home!
Looking for more guidance? Our landscaping team would love to help!

The Essential Guide to Seed Starting in Wisconsin

Starting seeds indoors is a rewarding way to get a head start on your garden, especially in Wisconsin, where the growing season is shorter. By starting your plants indoors, you ensure a stronger, more productive garden when the warmer weather arrives. Here’s what you need to know to successfully start seeds and set your garden up for success!
Equipment and Environment Needed
To give your seeds the best start, you’ll need the right equipment and growing conditions:
Seed Trays and Containers – Choose trays with drainage holes to prevent overwatering.
Seed-Starting Mix – Use a lightweight, well-draining mix designed for seed germination.
Grow Lights – Wisconsin’s winter sunlight isn’t always strong enough, so consider investing in LED or fluorescent grow lights for 12-16 hours of daily light.
Heat Mats (optional) – Many seeds, such as tomatoes and peppers, need bottom heat to germinate effectively.
Humidity Dome or Plastic Wrap (optional)– Helps retain moisture until seeds sprout.
Gentle Watering System – A spray bottle or watering can with a fine spout prevents soil disturbance.
Looking for the best seed-starting supplies? Visit our garden center to get everything you need for a successful start!
Things to Consider
Before you start planting, think about these key factors:
Timing Matters – Check your seed packets for recommended start times. Some seeds need 6-8 weeks before the last frost, while others need less time. In Wisconsin, our rule of thumb is that after May 15th we are typically safe from frost. Decide when you want to plant your seedlings outside and work the dates backwards to when you should start your seeds.
Space Planning – Make sure you have enough room for all your seedlings as they grow.
Temperature Control – Keep the room warm (65-75°F) to encourage germination.
Hardening Off – Before transplanting outdoors, gradually expose seedlings to outdoor conditions to prevent shock.
Why You Should Start Seeds Early
There are several benefits to starting seeds indoors before spring arrives:
Stronger, Healthier Plants – Giving seeds a controlled start indoors results in more robust plants when they move outside.
Extended Growing Season – Wisconsin’s climate can be unpredictable, so starting early allows for earlier harvests and blooms.
Greater Variety Options – Many unique or heirloom varieties aren’t available as transplants in stores, but you can grow them from seed.
Cost Savings – Growing from seed is more affordable than purchasing mature plants.
What Seeds Should You Start Early?
Some plants thrive when started indoors and then transplanted after the last frost. Consider starting these seeds indoors:
Vegetables: Tomatoes, peppers, eggplants, onions, and brassicas (broccoli, cauliflower, cabbage).
Herbs: Basil, parsley, thyme, and oregano.
Flowers: Petunias, marigolds, impatiens, and snapdragons.
Want expert advice on the best seeds for Wisconsin gardens? Stop by our garden center for personalized recommendations and top-quality seeds!
Get Started Today!
Now is the perfect time to plan your spring garden! Gather your supplies, choose your seeds, and start growing. Whether you’re a seasoned gardener or just beginning, our team is here to help every step of the way. Visit our store or shop online for all your seed-starting essentials!

Life of a Hanging Basket
Here’s a behind-the-scenes look at the life of a hanging basket at Down to Earth!

Preparing the Baskets
We begin by filling each hanging basket with high-quality potting mix, carefully chosen to provide the best aeration, drainage, and nutrients for optimal growth. To give the plants a great start, we also incorporate a slow-release fertilizer that ensures steady nourishment over time.

Receiving & Evaluating Plugs
Once our young plants (plugs) arrive at the greenhouse, we carefully unbox and evaluate them for quality. Each plug is inspected to ensure it is healthy and robust, as strong starting material is crucial to a successful basket.

Boosting Root Growth and Disease Resistance
To give our plants an extra edge, we dip them in a solution of beneficial organisms, including mycorrhizae, biofungicides, and bioinsecticides. This treatment promotes rapid rooting while also providing natural protection against unwanted insects and diseases. By fostering a healthy root system from the beginning, we set the stage for vigorous growth.

Planting with Care
Each plug is then planted according to our predetermined designs, ensuring a harmonious blend of colors, textures, and bloom times. Proper spacing is key, as it allows each plant room to grow without overcrowding. The right basket size is also selected to support the plants as they mature, preventing rootbound conditions and ensuring they have adequate room to thrive.

Natural Pest Control
To minimize the need for chemical treatments, we apply beneficial insects preventatively. These natural predators help control pests before they become a problem, promoting a healthier growing environment.

Encouraging Growth and Blooms
Once planted, the baskets are fitted with hangers and suspended in our greenhouse, where they can develop in ideal conditions. Regular watering and fertilization ensure the plants receive the nutrients they need for lush growth and abundant flowers. We use a balanced feeding regimen tailored to the needs of each plant variety.

Hand-Trimming for Fullness
To create the fullest, most beautiful baskets possible, we hand-trim each basket two to three times during the growing process. This encourages branching and denser growth, resulting in a final product that is full, lush, and ready to impress.

From Our Greenhouse to Your Home
By the time our hanging baskets are ready for sale, they have been carefully nurtured and tended with expert care. The combination of quality potting mix, beneficial treatments, precision planting, and meticulous maintenance ensures that each basket will flourish when it finds its new home.
From our greenhouse to your home, our baskets are grown with care to bring vibrant color and lush beauty throughout spring and summer, ensuring your outdoor spaces stay stunning all season long!

Why Live Plants Make the Best Presents

When it comes to gift-giving, we often reach for the tried and true—flowers, chocolates, or beautifully wrapped packages. But have you ever considered giving the gift of a live plant? At Down to Earth, we believe that living plants are more than just gifts; they are lasting expressions of care, growth, and connection. Here’s why a thriving plant makes for the perfect present compared to traditional gifts or even cut flower bouquets.
Long-Lasting Beauty
Unlike a bouquet that will wilt within a week, a live plant continues to grow and flourish, providing beauty and joy for months or even years. Whether it’s a lush pothos, a vibrant orchid, or a cheerful peace lily, plants remain a lasting reminder of your thoughtful gesture.
A Symbol of Growth and Renewal
Plants represent life, renewal, and personal growth. Gifting a plant to a loved one can symbolize encouragement, new beginnings, or support during life’s transitions. It’s a meaningful way to say, “I’m thinking of you” in a way that endures.
A Natural Mood Booster
Studies have shown that having plants in our spaces can reduce stress, boost mood, and improve concentration. Unlike other gifts that may fade into the background, a thriving plant brightens up any space and offers daily benefits!.
A Gift for Every Skill Level
Worried that your recipient doesn’t have a green thumb? No problem! There’s a plant for everyone, from low-maintenance succulents and ZZ plants to more care-intensive but rewarding orchids. We’re here to help you find the perfect match.
Visit Us and Find the Perfect Plant Gift
Looking for the perfect plant for a loved one—or even yourself? Stop by Down to Earth and explore our stunning flowering displays and vast selection of houseplants for all experience levels. Whether you’re shopping for a seasoned plant lover or a first-time plant parent, we have something special waiting for you.
Come see the beauty of plants in person and give a gift that keeps on growing!

Winter Bird Feeding: Why Suet is a Must-Have

As winter sets in across Wisconsin, backyard birds face a tough challenge—finding enough food to sustain them through the frigid temperatures and snow-covered landscapes. One of the best ways you can help them thrive is by offering suet, a high-energy food that provides essential fats and nutrients birds need during the colder months.
Why Suet?
Suet is a dense, calorie-rich food made from rendered animal fat. It’s particularly beneficial in winter because it offers the high-energy fuel birds require to maintain their body heat. Many birds that remain in Wisconsin throughout the winter, such as woodpeckers, chickadees, nuthatches, and jays, rely on suet when natural food sources become scarce.
Types of Suet and How to Offer It
Suet comes in a variety of forms, including cakes, balls, and even plugs designed to fit into specialized feeders. Some suet blends contain additional ingredients like nuts, berries, and seeds to attract a wider variety of birds. Here are a few suet feeding tips:
Use a Suet Feeder: Cage-style suet feeders allow birds to cling while feeding, mimicking their natural behavior. You can also find suet log feeders with pre-drilled holes for suet plugs.
Location Matters: Hang your suet feeder near trees or shrubs to provide birds with shelter and protection from predators.
Keep it Fresh: In extremely cold temperatures, suet stays fresh for a long time, but it’s always a good idea to check for mold or spoilage if there’s a warm spell.
Prevent Starlings and Grackles: If larger, aggressive birds are hogging the suet, consider an upside-down suet feeder, which is designed to favor clinging birds like woodpeckers and nuthatches.
Birds You’ll Attract with Suet
Offering suet in winter can bring a variety of beautiful birds to your backyard, including:
Downy and Hairy Woodpeckers – Small, agile, and frequent suet visitors.
Red-bellied Woodpeckers – Striking birds with a bright red cap and a fondness for suet.
Black-capped Chickadees – Tiny, energetic birds that love both suet and seeds.
White-breasted Nuthatches – Often seen moving headfirst down trees, these birds readily take to suet.
Blue Jays – These bold, vocal birds appreciate a suet cake mixed with peanuts.
Make Your Backyard a Winter Sanctuary
By providing suet along with other bird-friendly foods like black oil sunflower seeds, you’ll create a haven for winter birds and enjoy the beauty of nature right outside your window. In addition to food, consider offering a heated birdbath for fresh water and providing shelter with birdhouses or natural plant cover.
Shop In-Store for the Best Bird Feeding Supplies
If you’re ready to start feeding birds this winter, we have everything you need! From high-quality suet cakes to durable suet feeders, our in-store selection is curated to help you attract and support local bird species. Visit us today to stock up on winter bird feeding essentials and make this season a feast for your feathered friends!
Winter Houseplant Care: Tips to Keep Your Green Friends Thriving!

Did you know your houseplant friends need different care in the winter? With less sunlight during the season, most house plants photosynthesize less, leading to slower growth. Now is the perfect time to figure out how to nurture and care for your plants during the colder months. Let’s dive in!
Are Your Houseplants Still Growing?
The first step to winter care is assessing your plants. Take a close look for new growth or emerging leaves!
If your plants are growing: You can still fertilize during the winter! Just make sure to adjust your approach (more on this below).
If your plants have slowed or stopped growing: It’s okay to pause fertilizing. Winter can be a time for your plants to flush out built-up minerals and salts from previous feedings, giving them a fresh start for spring.
Winter Fertilizing Tips
Fertilizing in winter differs from the active growing months. If your plants are still showing growth:
Dilute your fertilizer to half-strength. With less sunlight and slower photosynthesis, they don’t need as much nutrition.
Feed your plants 1-2 times a month.
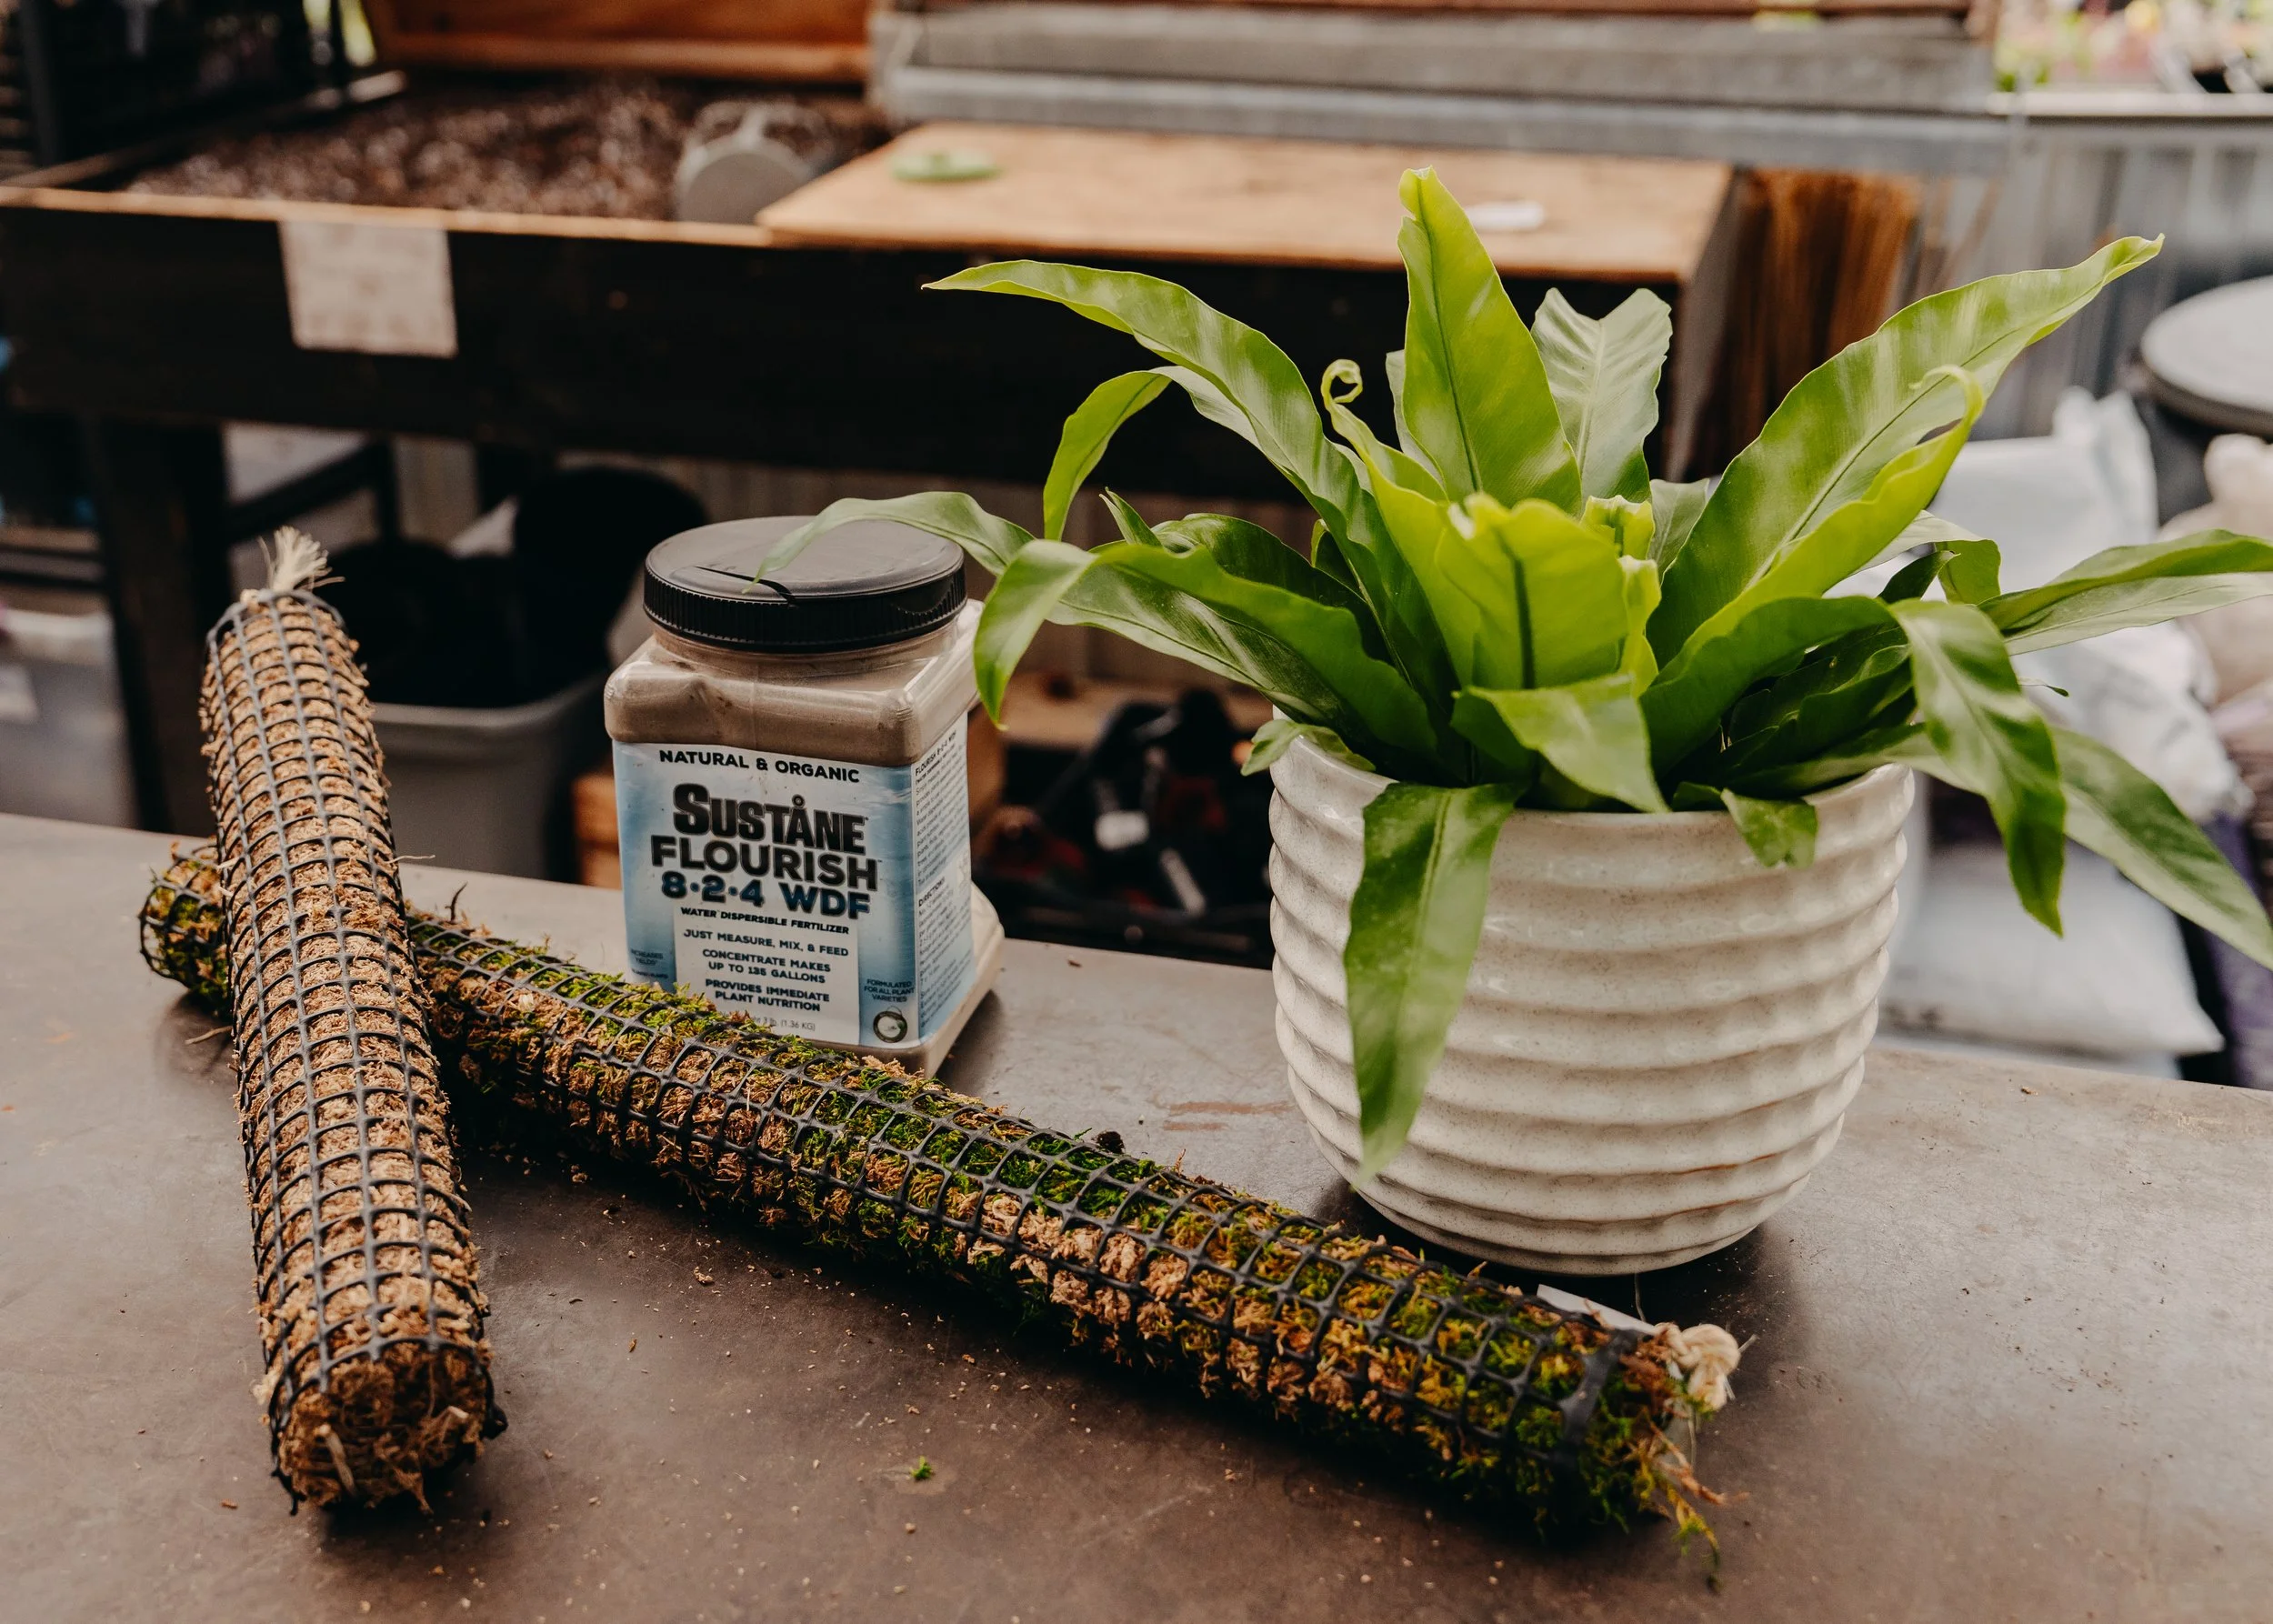
We love using Sustane Flourish Organic Houseplant Fertilizer for a gentle nutrient boost. Sustane is the product we use on our Collector Plant Collection in the greenhouse! Pair this with a soil conditioner like any products from our Neptune’s Harvest line to help your plants absorb nutrients more efficiently—a fantastic addition anytime, especially in winter.
For orchids that actively grow and bloom during winter, try Jack’s All-Purpose Active Feed and Bloom-Boosting Orchid Feed to support their specific needs.
Boosting Winter Light
Short winter days can leave your plants craving more light. Consider investing in grow lights to keep them happy! We offer a variety of options, including bulbs and easy-to-use light set-ups. Adding extra light ensures your plants can photosynthesize properly, even during low-light winters.
Dust Those Leaves!
Did you know that a layer of dust on your plant’s leaves can block light and reduce photosynthesis? Take time to wipe down your plant’s leaves with a damp cloth. This simple task can make a big difference in their overall health.
Avoid Winter Repotting
Even if your plant shows some growth, winter is not the ideal time to repot. Repotting can stress plants, and it’s better to wait until spring when they’re ready to bounce back. Instead, use this time to plan for a big repotting session in April when your plants will be eager to stretch their roots.
Plan for Spring, Care for Winter
Thoughtful care during the winter months sets the stage for a thriving spring! With these tips, your houseplants can stay happy and healthy all winter long. Remember, every little effort you make for them now will pay off when the growing season returns. Happy winter plant care!

How to Effectively Plan Your Vegetable Garden

It’s the time of year when gardeners start planning this year’s vegetable garden! Dreaming of an expansion? Adding in exciting new varieties? Trying something for the first time this year? Now is the time to start planning your layout so when spring arrives, you are ready to put your plan into action!
Step 1. Evaluate Your Space
The first step is to consider the space you have available to plant your vegetable garden. Considerations include lighting throughout the day, land available, and your access to water (you will thank yourself later when it is in the middle of hot July)! And don’t forget to set a date or reminder to collect a soil sample to send in for a soil test.
Step 2. Choosing Your Varieties
Now that your location has been selected, it is time to select your plant varieties! As fun as it is to pick the most unique, bizarre plant options, be sure to evaluate what you and your family will actually eat and use! Having a plan for each of your hand-selected varieties will not only eliminate waste at the end of the season, but it will also help you stay devoted and passionate about your vegetable garden!
Another thing to consider is harvest time. Make it easier on yourself by selecting plant varieties that will be ready to pick at different times so that you are not harvesting, handling, and preserving your entire garden in the same week. You can find this information on the back of most seed packets or by asking our staff!
Step 3. Garden Layout
Now it is time to lay out your garden plan on paper! Draw the dimensions of your desired space and begin to lay out where you would like to position each plant variety. You want to ensure that you group shorter crops together and taller crops by each other as well. This prevents tall crops blocking the light to shorter crops. If you are planting fruits and veggies with trailing foliage, plan your layout to prevent their vines from choking neighboring plants. You will want to keep like-growth pattern plants together to ensure happy plants and effective co-mingling!
Keep in mind that varieties being planted in smaller quantities should be kept together in their own space, leaving rows for larger production. This helps ease care through the season for smaller crops, keeping them from being overpowered by other plants or forgotten in the deep sea of green leaves in the middle of your garden space! Companion planting is also an important concept to consider in your layout - not all plants like to be planted next to one another, yet some thrive planted in close proximity!
Succession planting: Some veggies, such as leaf lettuce, are able to be harvested + planted multiple times in the season. You will want to plant these varieties in an easily accessible area so that you won’t disturb the surrounding plants. We recommend keeping them at the edge of your garden if you plan to replant multiple times in the year.
Additional tips + tricks! Try planting Marigolds around the border of your garden to help with pest control! Or try flowers to create a beautiful, eye-catching garden border that will attract all the pollinators to your garden!
Alternative Garden Options
If you don’t have the space (or time!) to do an in-ground vegetable garden, you can always do an alternative style such as a patio garden or raised beds! We offer a variety of compact vegetable options that will not grow as large as their traditional counterparts. We carry compact varieties of beans, tomatoes, cucumbers, and a few different peppers! Most herbs are also a naturally compact option for smaller areas. Don’t let space restrictions deter you from starting your own vegetable garden!
Make your gardening dreams come true with this practical step-by-step guide! If you are looking for some extra assistance in your garden planning, we would love to help! Stop in to see all of our gardening tools and plants, and to talk with one of our expert staff. We can guide you in planning this year’s vegetable garden - or consider joining us for our next Herb and Veggie 101 class to learn more about vegetable gardening!

The Essential Guide to Winter Tree Trimming

Winter is the perfect time to care for your trees and set them up for a healthy growing season ahead. With the leaves gone, it's easier to see the tree's structure, making it ideal for trimming and pruning. Let’s dive into the benefits of winter tree trimming, which tree varieties benefit most, and how to approach this important task.
Why Trim Trees in Winter?
Trimming trees during their dormant season (late fall through early spring) minimizes stress on the tree and reduces the risk of disease or pest infestations. The cold weather also ensures that cuts heal more effectively, giving your tree a head start when spring arrives.
Tree Varieties That Should Be Trimmed in Winter
Certain tree species thrive when pruned during the winter months. These include:
Deciduous Trees: Oaks, maples, crabapples, and birches benefit from winter pruning to prevent sap loss and disease.
Fruit Trees: Apple, pear, and cherry trees should be pruned to encourage better fruit production and healthier growth.
Shrubs and Hedges: Shrubs like hydrangeas or ornamental hedges can also be trimmed to maintain their shape and promote growth.
Avoid pruning spring-blooming trees or shrubs like lilacs, rhododendrons, or magnolias in winter, as this could reduce their blooms.
What to Look For While Trimming
When trimming your trees, focus on the following:
Dead or Diseased Branches: Remove any branches that are clearly damaged, discolored, or brittle.
Crossing or Rubbing Branches: Trim branches that are growing into each other to prevent damage and improve airflow.
Overgrowth: Thin out overly dense areas to allow sunlight and air to penetrate.
Shape and Balance: Maintain the tree’s natural shape by evenly trimming the crown and removing awkward or unbalanced growth.
Essential Tools for Tree Trimming
To trim your trees safely and effectively, you'll need:
Pruning Shears: For small branches and precise cuts.
Loppers: For medium-sized branches.
Hand Saw: For larger branches or thicker growth.
Pole Pruner: For hard-to-reach branches.
Protective Gear: Gloves, safety glasses, and a sturdy ladder for tall trees.
Basic Instructions for Winter Trimming
Start by inspecting the tree for dead, diseased, or damaged branches.
Use sharp, clean tools to make cuts at a 45-degree angle, close to the main branch or trunk.
Remove any small, weak branches growing near the base of the tree.
Step back periodically to assess the tree’s shape and balance as you trim.
We’re Here to Help!
Winter tree trimming can be a big task, but you don’t have to tackle it alone. Our expert team provides winter tree trimming services for your small-medium trees (under 20’) to keep your trees healthy, beautiful, and ready for spring.
Contact us today to schedule your winter tree trimming service and ensure your trees are in their best shape for the new season!


There is No Place Like Local for the Holidays!

When it comes to the holiday season, there truly is no place like local. As the air fills with the scent of pine, the streets twinkle with festive lights, and everyone gears up for holiday celebrations, there’s something special about turning to your local businesses and communities to make the season bright. Here’s why going local for the holidays creates unforgettable memories, spreads joy, and strengthens the spirit of the season.
Personal Touch in Every Gift
Local shops are the heart of the holiday gift-giving experience and items purchased often come with a story. Whether it's handcrafted pottery, custom made jewelry, or locally sourced treats, these thoughtful finds carry the warmth and creativity of your community. Shopping local means you’re not just giving a gift but sharing a piece of your town’s unique charm.
Festive Experiences Close to Home
Winter Farmers Markets, Artist Markets, and other winter events at Down to Earth give you opportunities to explore an expanded variety of locally made products! These events foster a sense of togetherness and give you the perfect platform to purchase gifts for friends and family while making a difference in our community.
Supporting Your Neighbors
When you shop at local businesses, you’re not just buying a product; you’re supporting the dreams of your neighbors. Small business owners work tirelessly to bring something special to their communities, and every purchase helps them thrive. Choosing local over big-box stores ensures that your dollars stay in the community, boosting the local economy and spreading holiday cheer where it matters most.
One-of-a-Kind Finds
Big-name stores may have flashy sales, but they can’t compete with the unique treasures you’ll find at local shops. Whether it’s a limited-edition item, an artisanal creation, or a quirky piece that perfectly fits your loved one’s personality, local businesses offer an endless array of distinctive options. These special touches make every gift feel more personal and meaningful.
This holiday season, celebrate the magic of your community by supporting local. Discover one-of-a-kind gifting for plant-lovers, food connoisseurs, fashionistas, and more when you shop local at the Shops of Down to Earth! There is truly no place like local for the holidays.

Styling Fresh Greens

Bring the beauty of nature right to your doorstep by styling fresh greens outside your home! Whether it's a vibrant wreath on your front door, cascading garlands along your porch railing, or potted arrangements bursting with lush foliage, incorporating fresh greenery is a simple yet stunning way to elevate your outdoor space. You will love that these pieces can decorate your home all winter long!

How to Style Garlands
Styling fresh garland outdoors is a wonderful way to add a natural, elegant touch to your home’s exterior. Start by draping the garland along your porch railing, staircase, or doorway to create a welcoming frame.
Secure it with sturdy hooks, floral wire, or decorative ribbons for both functionality and flair. For a festive look, weave in twinkling string lights or tuck in seasonal accents like pinecones or berries!

How to Style Wreaths
A fresh wreath is the perfect way to add a pop of greenery and personality to your entryway! Start by choosing a wreath that complements the overall aesthetic of your home—classic evergreen for a traditional look or bold holiday colors for a festive touch. Hang your wreath on your front door using a sturdy wreath hanger or a decorative ribbon looped over the top.
Grab one for all of your exterior doors, including your main door, garage doors, or even shed doors to create an instant upgrade for your home!

How to Style Porch Pots
Transform your entryway into a cohesive and inviting space with winter porch pots! Whether you choose to display a pot on either side of your entry door or spice things up with a cluster of pots, there are so many possibilities! When grouping your pots, be sure to use varying heights together for a more dynamic, layered look. Arrange multiple pots, using the tallest as the anchor piece, then surround it with smaller pots to create a visually appealing flow.
To tie everything together, incorporate outdoor elements like lanterns, a doormat, or garlands that match the pots. Lighting is another key component; fairy lights woven through greenery or placed nearby can highlight your pots and create a warm, welcoming glow.

Front Porch Style Inspo
Styling your front porch with fresh greens can be easy! Make a statement while keeping it simple on your front step!
Materials:
- 1 wreath
- 2 porch pots
Quickly + easily arrange your pieces for the perfect all-winter-long look!
NOTE: Add some colorful Christmas bling to your wreath or porch pots that can easily be switched out after the holidays!
Be sure to shop our seasonal selection of porch pots, garland, centerpieces, wreaths + more! We also offer workshops to make your own fresh wreaths + porch pots in November + December! This is a great way to create your own custom combo for your home!

Don’t forget your Wilt-Stop!
to help keep your fresh greens hydrated + to prevent winter burn! Find it in our greenhouses!

Create a Stunning Winter Porch Pot: A Step-by-Step Guide

It is time to embrace the changing season by adding a festive touch to your front porch. A winter porch pot is a great way to keep your home looking lively, even when flowers are out of season! This easy DIY project brings natural beauty to your space and adds a warm welcome for guests. Here’s a step-by-step guide to creating your own winter porch pot masterpiece.

1. Fill the Container with Soil
Start by selecting a sturdy pot that can handle the colder winter temperatures like a large plastic or resin planter, which tends to resist cracking in cold weather. Fill your container with fresh potting soil about three-quarters of the way full. This soil base will help anchor the greens and give them stability throughout the season.

2. Water in the Soil
Before adding any greens, give the soil a good watering. Moist soil will freeze in colder weather, which helps secure the branches and keeps them from shifting around. A well-moistened base will also keep the greens hydrated, so they stay fresh and vibrant longer.

3. Trim the Ends of the Greens
Gather your evergreen boughs and other greens, such as spruce, pine, or cedar branches. Trim the ends at a slight angle with sharp pruning shears. This not only helps the greens absorb water more effectively but also makes them easier to insert into the soil.

4. Start with a Spruce Top for Height
Begin by placing your tallest piece, your Spruce Top, in the center of the container. The spruce top will serve as the main focal point and provide height and structure. Make sure it's firmly embedded in the soil, as it will anchor the rest of your arrangement.

5. Fill in with Accent Greens and Other Leafy Foliage
Now that the central piece is in place, add accent greens to fill out the arrangement. Pine, cedar, and juniper are perfect choices because they add texture and depth. Arrange these branches around the spruce top, varying their lengths and layering them to create a full look. Don’t be afraid to mix in other natural elements, like red dogwood, eucalyptus, or magnolia to add dimension and contrast.

6. Decorate with "Bling"
Add decorative elements to personalize your porch pot. Pinecones, berry sprigs, or even ornamental branches with a dusting of glitter can create a festive feel. You might also consider adding holiday-themed ornaments, small LED lights, or ribbon for an extra pop of color and sparkle. These decorative touches bring a winter wonderland look to your pot.

7. Water Your Finished Porch Pot
Finally, give your completed porch pot one last watering. This will help settle everything into place and keep the greens fresh. If the temperature is below freezing, the water will form ice, which will keep the branches anchored and hydrated.
Tips for a Beautiful Winter Porch Pot
Until the pot freezes, keeping the soil moist/watering as needed is necessary to prevent needles from dropping.
Mix Textures: Using a variety of evergreens creates interest and adds a dynamic feel to your pot.
Play with Height: Taller greens in the center and shorter branches along the sides create a balanced look.
Seasonal Bling: Small touches like fairy lights or colorful ornaments are an easy way to add a festive flair.
Be sure to create a wreath to match your beautiful new porch pot!
Don’t forget your Wilt-Stop! This is the perfect product to use to keep your greens hydrated + healthy!
With these simple steps, you’ll have a gorgeous winter porch pot that brightens your entryway all season long. Enjoy your stunning creation, and have fun bringing winter’s beauty to your doorstep!

You Asked, We Answer: Fall Hydrangea Pruning

One of the most common questions we get asked out in the yard in the fall is “What do I do to prepare my Hydrangea for winter?” We are here to take away the guesswork on your Hydrangea care! Below, you will find the information for pruning Panicle Hydrangeas.
To Prune or Not to Prune…
There are many different opinions out there for trimming, including whether you should trim your Hydrangea in the fall or spring. Although both options get the job done, we do recommend pruning in the fall because of our harsh winters. If we receive a heavy snow (which we all know we will!), those large flowers can collect the snow, causing preventable branch breaking. Trim the dried florals off of your bush or tree to help protect it during the harsh winter snow!
Repurposing your flowers: We are all about repurposing! When you trim your hydrangeas, save the dried florals for a beautiful addition to your home decor! Hydrangeas add a beautiful texture and are easy to style!
Shaping
As a rule of thumb, we recommend trimming no more than ⅓ of your plant. This will help encourage it to push new growth in the spring, while still shaping it! For Hydrangea trees, attempt to create a V-Shape design to keep its natural growth pattern. If there is a “leggy” branch, feel free to trim it down close to the base.
Pruners & Disinfectant
Don’t forget to disinfect your pruners! As undesirable as this step may be, it is especially important when you are switching between multiple shrub or tree types to prevent any infection or disease transfer. Grab a bucket of soapy water or rubbing alcohol to dip your pruners in between plant varieties.
The most important tool for your fall pruning IS your pruners! Make sure you have a sharp, high-quality option by picking up a new pair from our Garden Shop! If you have fall pruning questions, our yard staff is happy to help!

Winter Garden Prep

As the vibrant colors of fall emerge and the air turns crisp, it's time to shift our focus to garden preparation for the colder months. Whether you’re tending to perennials, shrubs, trees, or vegetable gardens, there are essential tips to help ensure your plants thrive all winter long.
Hydration is Key
Even as temperatures drop, it’s crucial to continue watering your perennials, trees, and shrubs until the ground is frozen. Hydration is key for these plants to build resilience against winter stress. Consistent watering encourages strong root systems, ensuring they are well-prepared for the chill ahead.
Mulching
Keep your plants cozy + insulated! Mulching is a fantastic way to insulate your garden. Whether you choose to mulch in the fall or spring, it’s easy to do and offers a range of benefits. We have both bagged and bulk mulch available to help cover landscape beds, trees, and shrubs. If you notice that your mulch layer is thin this season, consider top dressing your mulch. A thicker layer helps eliminate the freeze-thaw cycles that can damage roots and soil structure.
Pruning and Cutting Back
Fall is a great time to cut back certain perennials, helping to prepare them for a healthier spring. Whether you choose to do this in the fall or wait until spring, trimming back can encourage new growth and keep your garden looking tidy.
October is the ideal time to trim varieties such as hydrangeas, ninebark, and other varieties that bloom in the summer or fall. Be mindful, however, to avoid trimming azaleas, rhododendrons, and lilacs in the fall, as they set their buds for next season during this time.
Clearing Out Vegetable Gardens
When it comes to your vegetable garden, it's essential to completely clear out any old plant debris. This helps prevent pests and diseases from lingering over the winter. After cleaning, add a layer of untreated leaves or grass clippings to enrich your soil with organic matter. It’s best not to till the soil at this time of year, as it can disrupt beneficial microorganisms.
Fall Bulb Planting
As you clean up your perennials, make room to plant fall bulbs like tulips and garlic! Remove any remaining plant debris to create a tidy planting area. A fresh layer of mulch over your bulbs will provide insulation and help retain moisture through the colder months. Plant your fall flower bulbs now and enjoy a beautiful, colorful garden in the spring!
Fall Tree Plantings
There are so many advantages to planting your trees in the fall! Not only can you save on trees at Down to Earth during our fall sales, you also can benefit from the seasonal shift! Planting in the fall allows for your tree to take full advantage of all the moisture brought on by the spring thaw. This (and other factors) can allow your tree to be a “season ahead” and more mature than if you were to plant in the spring.
Edging Your Beds
Fall is also a fantastic time to re-edge your garden beds. Clean up the edges to create a crisp, defined look that enhances your landscape's overall appeal. A well-maintained edge not only looks great but also helps prevent grass and weeds from encroaching on your garden beds.
Stock Up on Garden Essentials
To help with all these tasks, don’t forget to visit our garden shop! We have a selection of pruners, gloves, kneelers, and mulch to make your gardening experience more enjoyable and efficient.With a little effort now, you can set the stage for a beautiful and healthy garden next spring!